
Taking Suitable ‘Before and After’ Photos for Injectables

Taking suitable patient Before and After photos is a crucial part of good aesthetics practice. Developing this routine habit will establish you as a competent and ethical injector.
Before and After photos aren’t just something used in marketing - when consented; they’re a medicolegal requirement. They’re also a tool for managing your patient’s journey and can be useful when dealing with any complaints. This makes perfecting your Before and After patient photos a critical competency to develop while training. It’s a skill that’ll stand you in good stead throughout your aesthetics career.
During your Level 7 Diploma in Botox & Dermal Fillers, you’ll be shown how to take clear Before and After photos by an aesthetics specialist.
6 steps to taking better Before and After photos
Sandra Mihai from our Student Support team explains what medical aesthetics practitioners need to know about Before and After photos…
She notes, “It’s important that you not only start taking these photos during your Level 7 training but that you take them well and accurately to establish good aesthetics practice.” This includes the following:
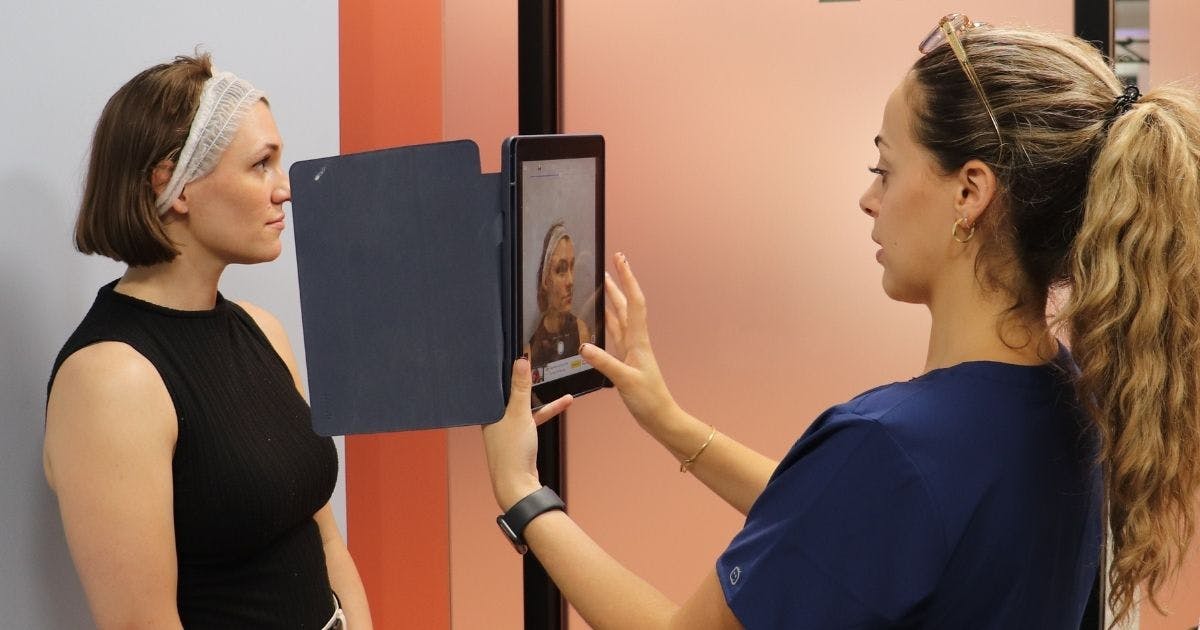
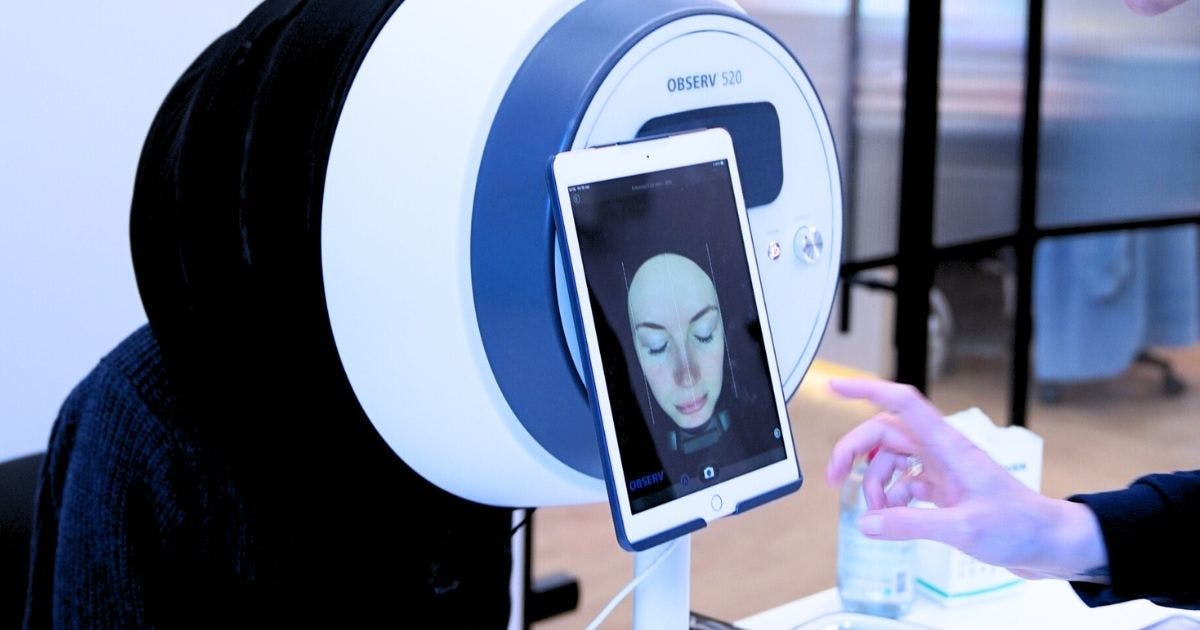
1. Suitable device
Ensuring you have a suitable device to take precise photographs with. During your Level 7 aesthetics training with us, you’ll be using our iPads. If your practice has a skin analysis device, you may want to use this to take your Before and After photos.
Top Tip! You can use tools such as the TimeStamp app or any similar app that dates and timestamps photos. This is a good practice for keeping patient records.
3. Lighting
Make sure that your photos are taken in a suitable light – not too bright and not too dark. You need to be able to see the patient’s features distinctly. You should also ensure the lighting is consistent in the Before and After photos.
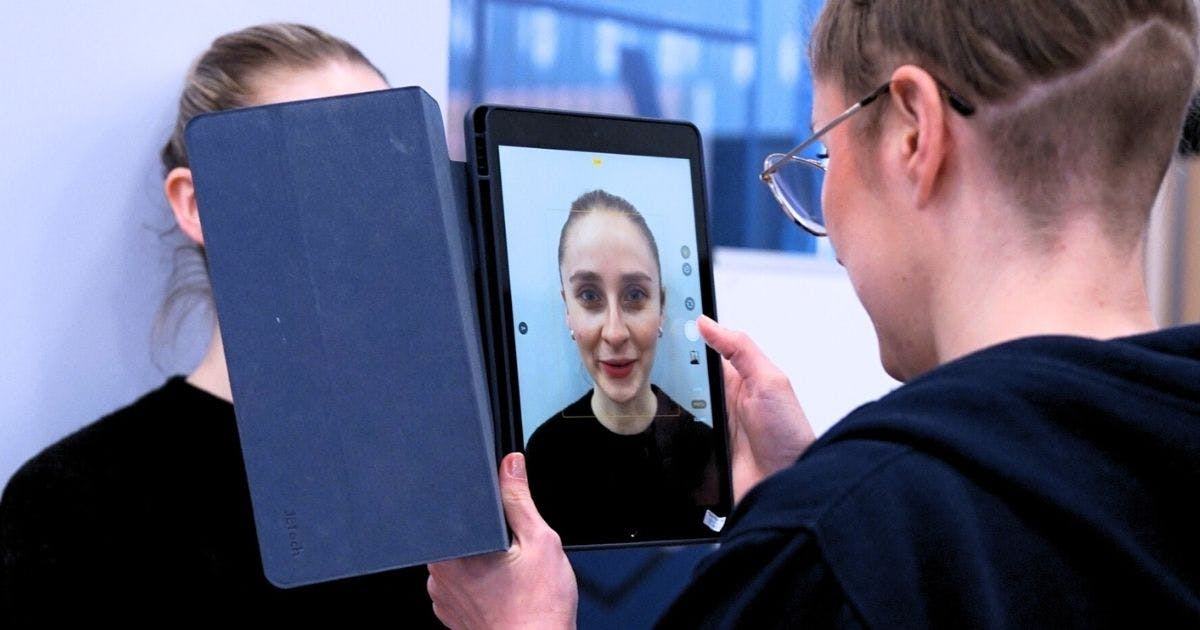
4. Correct orientation
When taking photos, ensure you are using a portrait (vertical) orientation and not a horizontal one. The patient’s face should be in full view.
5. Variety of angles
Take at least two photographs of each patient. One before treatment and one after, both from the same angle each time. Ideally, you want to be taking photos from each of these angles per patient, before and after treatment:
A) Front,
B) 90º left and 90º right
C) 45º left and 45º right
Top Tip! Ask the patient to hold their head up straight and look directly ahead. Then ask them to move their whole body - not just their head - so that their feet and head are facing front. Ask them to face your left shoulder and then your right shoulder. Then ask them to stand with alternate arms against the wall. This allows for more similar before and after images.
6. Final checks
After taking your photos, check that they’re clear and crisp, if they’re blurry then retake them. You can also use this opportunity to compare the After photos to the Before set, to get the angles as close as possible.
How Before and After photos benefit your aesthetics business and patients
Posting Before and After photos is also a great marketing tool. Sharing them on your website and social media accounts allows potential patients to see your injecting style and the kind of results you can offer. However, always make sure you get written patient consent before posting anything online.
If you often post Before and After images, this can show patients that you have a regular stream of returning and new patients. This can be encouraging for patients as it can build trust.
For patients considering injectable treatments who are unsure of the visual change, it presents an opportunity to see how their results may look. It also allows you to demonstrate the type of treatments you offer. Some people are more visual and doing this ensures you’re tailoring to all needs.
To summarise, photo-taking is a great tool for keeping patient records and is considered not only best practice in medical aesthetics, but a medicolegal requirement. If you’re looking for additional tips on how to take good photos and patient positioning, head over to our article on Clinical Photography for Aesthetics Practitioners.
All information correct at the time of publication
Download our full prospectus
Browse all our injectables, dermal fillers and cosmetic dermatology courses in one document
By submitting this form, you agree to receive marketing about our products, events, promotions and exclusive content. Consent is not a condition of purchase, and no purchase is necessary. Message frequency varies. View our Privacy Policy and Terms & Conditions
Attend our FREE open evening
If you're not sure which course is right for you, let us help
Join us online or in-person at our free open evening to learn more
Our Partners


STAY INFORMED
Sign up to receive industry news, careers advice, special offers and information on Harley Academy courses and services